11. Mobile Inference
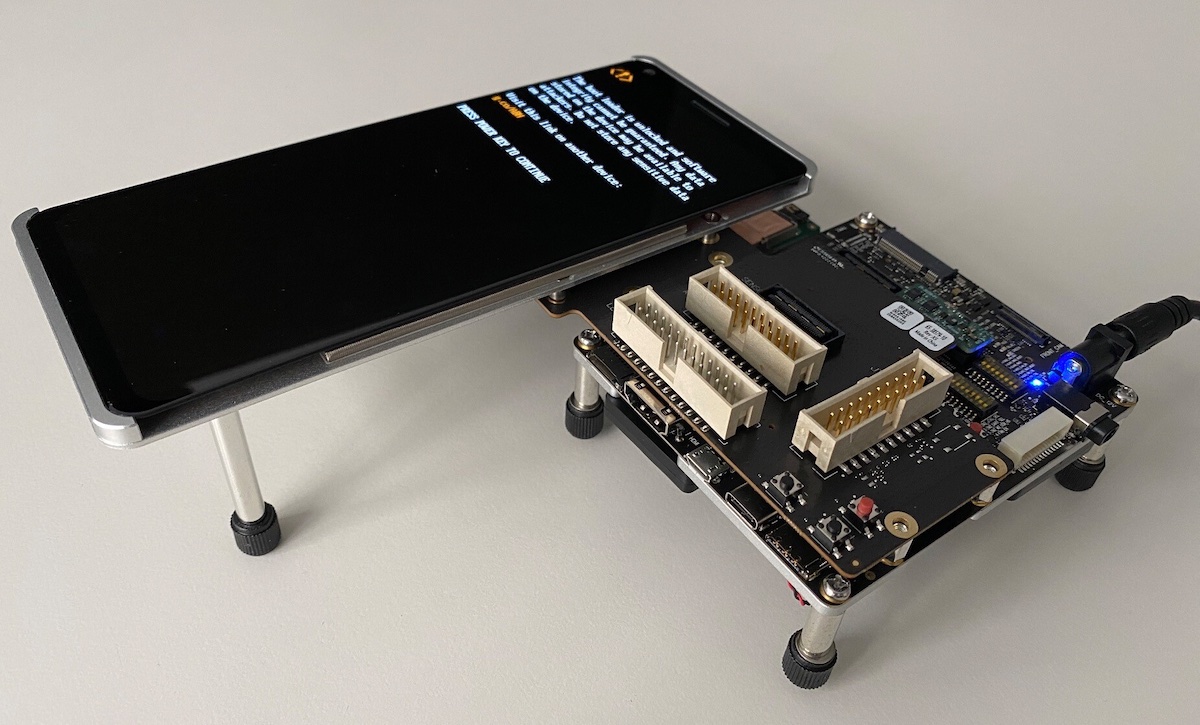
Fig. 11.1 Photo of the HDK8550 Development Kit used in this lab. The motherboard contains a SM8550P system on chip.
In this lab, we will deploy a trained deep learning model on mobile devices. We will use the SM8550P System On Chip (SoC) from the HDK8550 Development Kit. The SoC has several accelerators that we can use for machine learning inference: A Central Processing Unit (CPU), a Graphics Processing Unit (GPU) and a Hexagon Tensor Processor (HTP). As described in the Qualcomm Developer Network, the accelerators have different characteristics. In particular, low-precision floating-point computations and quantization play a critical role in fully utilizing the SoC at inference time.
11.1. Model and Data Conversions
This section discusses the on-device deployment of a trained machine learning model.
While the approach is generalizable, for brevity we limit our discussion to the ResNet-18 model.
An AIMET export of the ResNet-18 model is provided in the file aimet_export.tar.xz.
In addition to the graph and the FP32 weights, the corresponding quantization parameters generated by AIMET are also provided.
Our goal is to run the ResNet-18 inference workload on the available machine learning accelerators, i.e., the CPU, GPU and HTP of the SM8550P SoC. For now, we will limit our efforts to the necessary preprocessing, execution, and postprocessing steps of the inference pipeline. Once that’s done, we’ll benchmark the performance of the accelerators in Section 11.2.
Note
You can deploy other models in a similar fashion.
For example, detailed documentation for SESR or EnhancedGAN networks is available as part of the Qualcomm Developer Network.
In addition, the Qualcomm AI Engine Direct SDK documentation provides a tutorial for the Inception v3 model.
The SDK documentation is available on the server lechuck.inf-ra.uni-jena.de in the directory /opt/qcom/HexagonSDK/5.5.0.1/docs/.
All tools needed to deploy the exported model on the mobile devices are preinstalled on the server lechuck.inf-ra.uni-jena.de.
The server is also connected to the development kits so that you can issue file transfers and executions without additional hops.
We will use the Qualcomm AI Engine Direct SDK to deploy our models.
In general, we need to perform the following steps for on-device inference:
Translate the model exported from PyTorch into a format that can be run on the target accelerator. This step may include enabling the model for quantized inference.
Prepare the input data so that it can be used on the device. We will use raw FP32 values from the face-blurred ImageNet test dataset. The data preparation step has already been done for you and the (pre-processed and shuffled) data are available in the
/opt/data/imagenet/raw_test/batch_size_32directory on the server. Each batch has the size [32, 224, 224, 3], i.e. we have 32 samples per batch, 224x224 pixels per image and three color channels.Transfer the prepared model and data from the host to a mobile device.
Run the inference workload on the device.
Transfer the results from the mobile device back to the host, and analyze the results.
Of course, in more sophisticated settings, one could interface directly with the mobile device’s sensors for data input or process the obtained results on the device, e.g., in a user-facing application, without relying on a possibly non-existent host.
lechuck.inf-ra.uni-jena.de.1conda activate ai_direct
2export QNN_SDK_ROOT=/opt/qcom/aistack/qnn/2.18.0.240101/
3source ${QNN_SDK_ROOT}/bin/envsetup.sh
4export LD_LIBRARY_PATH=${LD_LIBRARY_PATH}:/usr/lib/x86_64-linux-gnu/:/opt/anaconda3/envs/ai_direct/lib/
5export PATH=$PATH:/opt/qcom/HexagonSDK/5.5.0.1/tools/android-ndk-r25c
To get started, set up your environment by following the steps in Listing 11.1.1.
The conda environment ai_direct is installed system-wide on the server.
If conda is not available in your terminal, first run /opt/anaconda3/bin/conda init bash.
Host CPU
 1# produces a network which expects 32,224,224,3 input data (see model/resnet18_fp32.cpp)
 2${QNN_SDK_ROOT}/bin/x86_64-linux-clang/qnn-onnx-converter \
 3  --input_network aimet_export/resnet18/resnet18.onnx \
 4  --input_encoding 'input' other \
 5  --batch 32 \
 6  --debug \
 7  --output model/resnet18_fp32.cpp
 8
 9# compile a dynamic library which represents the model
10${QNN_SDK_ROOT}/bin/x86_64-linux-clang/qnn-model-lib-generator \
11  -c model/resnet18_fp32.cpp \
12  -b model/resnet18_fp32.bin \
13  -o model_libs
14
15# generate list of inputs
16touch target_raw_list_host.txt
17for i in $(seq 0 9); do echo /opt/data/imagenet/raw_test/batch_size_32/inputs_$i.raw >> target_raw_list_host.txt; done
18
19# run the model
20${QNN_SDK_ROOT}/bin/x86_64-linux-clang/qnn-net-run \
21              --log_level=info \
22              --backend ${QNN_SDK_ROOT}/lib/x86_64-linux-clang/libQnnCpu.so \
23              --model model_libs/x86_64-linux-clang/libresnet18_fp32.so \
24              --input_list target_raw_list_host.txt \
25              --output_dir=output/host_fp32
As a sanity check, we first run our model on the host CPU using the Qualcomm AI Engine Direct SDK.
This means that we will simply use the CPU of the SoC server for the time being.
The necessary steps are outlined in Listing 11.1.2.
Given the exported ONNX version of our model, lines 2-7 generate the C++ version resnet18_fp32.cpp of the model along with the model weights in resnet18_fp32.bin.
These two files are then used to generate the library libresnet18_fp32.so in lines 10-13.
This shared library is used in lines 20-25 to run the model.
The data to be passed to our model is specified in the file target_raw_list_host.txt.
In this example, we simply tell qnn-net-run to use the first 10 batches of the pre-processed face-blurred Imagenet test dataset by specifying their locations in line 17.
Task
Run the ResNet-18 model on the host CPU of the SoC server.
Write a Python script that interprets the generated results in output/host_fp32.
Compare your results with the actual labels.
Note that the provided ResNet-18 has an accuracy of about 68.4% w.r.t. the face-blurred Imagenet dataset.
Kryo CPU
Now let’s move forward and run our inference workload on a mobile device for the first time. A number of HDK8550 development kits are connected to the SoC server. The development kits are running the Android operating system version 13. Therefore, we need to use the Android Debug Bridge (adb) to transfer data to and from an HDK8550 kit and to run our workload on a development kit. Unlike previous labs, we’ll use the same user to log in to the kits. This means that you will share the kits and user accounts with your classmates.
Important
Create your own directory in
/data/local/tmp/. Use your first name as the name of this directory. Do not touch any files elsewhere on the file system!The development kits have root access enabled. Do not run root commands unless explicitly told to do so!
Coordinate with your peers when using the kits. Use the class matrix channel if you are not in the lab room.
The call to qnn-model-lib-generator in lines 10-13 of Listing 11.1.2 has already converted our model into a version that can run on the Kryo CPU of the SM8550P.
Note that the Kryo CPU has Armv9 cores while our SoC server has x86 cores so different libraries and executables are required for the two architectures.
 1# set serial of android device
 2export ANDROID_SERIAL=3000a4df
 3# set user directory on the device
 4export DEVICE_USER_DIR=/data/local/tmp/alex
 5
 6# create directory to host the model and data on device
 7adb shell "mkdir -p ${DEVICE_USER_DIR}/resnet18_cpu_fp32"
 8
 9# copy the runner and compiled model to the device
10adb push ${QNN_SDK_ROOT}/bin/aarch64-android/qnn-net-run ${DEVICE_USER_DIR}/resnet18_cpu_fp32
11adb push ${QNN_SDK_ROOT}/lib/aarch64-android/libQnnCpu.so ${DEVICE_USER_DIR}/resnet18_cpu_fp32
12adb push model_libs/aarch64-android/libresnet18_fp32.so ${DEVICE_USER_DIR}/resnet18_cpu_fp32
13
14# copy data from host to device and set up target list on device
15adb shell "mkdir -p ${DEVICE_USER_DIR}/data/imagenet/raw_test/batch_size_32"
16adb shell "touch ${DEVICE_USER_DIR}/resnet18_cpu_fp32/target_raw_list.txt"
17for batch in $(seq 0 9); do \
18  adb shell "echo ${DEVICE_USER_DIR}/data/imagenet/raw_test/batch_size_32/inputs_${batch}.raw >> ${DEVICE_USER_DIR}/resnet18_cpu_fp32/target_raw_list.txt"
19  adb push data/imagenet/raw_test/batch_size_32/inputs_${batch}.raw ${DEVICE_USER_DIR}/data/imagenet/raw_test/batch_size_32/inputs_${batch}.raw
20done
21
22# execute the model on the device CPU
23adb shell "cd ${DEVICE_USER_DIR}/resnet18_cpu_fp32; LD_LIBRARY_PATH=. ./qnn-net-run --backend libQnnCpu.so --model libresnet18_fp32.so --input_list target_raw_list.txt"
24
25# copy results from device to host
26adb pull ${DEVICE_USER_DIR}/resnet18_cpu_fp32/output output/cpu_fp32
Listing 11.1.3 outlines the steps for execution on the CPU of the mobile platform.
Line 2 specifies the id of the development kit on which we will run our inference workload.
To list the ids of all available kits, use the command adb devices -l.
Next, line 4 sets the working directory on the mobile device that will be used in later commands.
Lines 10-20 copy all the necessary files from the host to the development kit.
In addition, lines 16-20 assemble target_raw_list.txt, which contains the on-device location of our input data.
Line 23 runs the inference workload on the mobile platform.
The computed results are copied back from the device to the host in line 26.
Task
Run the ResNet-18 model on the Kryo CPU of the SM8550P SoC. Verify that your results match those obtained when running on the host CPU.
Adreno GPU
We successfully ran our first inference workload on a mobile device 🥳.
Now, let’s harness the power of the Adreno 740 GPU to accelerate our workload.
As before, we are fortunate that the qnn-model-lib-generator call in Listing 11.1.2 has already performed the necessary conversions for us.
 1# assuming ANDROID_SERIAL and DEVICE_USER_DIR to be set
 2# assuming that the imagenet data is already present
 3
 4# create directory to host the model and data on device
 5adb shell "mkdir -p ${DEVICE_USER_DIR}/resnet18_gpu_fp32"
 6
 7# copy the runner and compiled model to the device
 8adb push ${QNN_SDK_ROOT}/bin/aarch64-android/qnn-net-run ${DEVICE_USER_DIR}/resnet18_gpu_fp32/
 9adb push ${QNN_SDK_ROOT}/lib/aarch64-android/libQnnGpu.so ${DEVICE_USER_DIR}/resnet18_gpu_fp32/
10adb push model_libs/aarch64-android/libresnet18_fp32.so ${DEVICE_USER_DIR}/resnet18_gpu_fp32/
11
12# set up target list on device
13adb shell "touch ${DEVICE_USER_DIR}/resnet18_gpu_fp32/target_raw_list.txt"
14for batch in $(seq 0 9); do \
15  adb shell "echo ${DEVICE_USER_DIR}/data/imagenet/raw_test/batch_size_32/inputs_${batch}.raw >> ${DEVICE_USER_DIR}/resnet18_gpu_fp32/target_raw_list.txt"
16done
17
18# execute the model on the device GPU
19adb shell "cd ${DEVICE_USER_DIR}/resnet18_gpu_fp32; LD_LIBRARY_PATH=. ./qnn-net-run --backend libQnnGpu.so --model libresnet18_fp32.so --input_list target_raw_list.txt"
20
21# copy results from device to host
22adb pull ${DEVICE_USER_DIR}/resnet18_gpu_fp32/output output/gpu_fp32
As shown in Listing 11.1.4, running the GPU version of our model is very similar to what we did for the Kryo CPU of the SoC. However, keep in mind that the CPU and GPU are very different computer architectures, so this complexity is hidden from us by the AI Engine Direct SDK.
Task
Run the ResNet-18 model on the Adreno 740 GPU of the SM8550P SoC. Verify that your results match those obtained when running on the host CPU.
HTP
The Hexagon Tensor Processor (HTP) is the final accelerator we will use in this lab. The HTP has a matrix unit that targets high performance on-device machine learning inference. In particular, we will leave the FP32 world at this point and derive a quantized int8 version of the ResNet-18 model that can run on the HTP. Note that when we used AIMET in Section 10, we derived and exported quantization parameters, such as scaling factors. However, the framework still exported the weights as FP32 data which means that the actual conversion to integer data for on-device deployment is still pending.
 1# assuming ANDROID_SERIAL and DEVICE_USER_DIR to be set
 2# assuming that the imagenet data is already present
 3# assuming a file target_raw_list_host.txt is present on the host
 4
 5# produces a quantized network which expects 32,224,224,3 input data (see model/resnet18_int8.cpp)
 6${QNN_SDK_ROOT}/bin/x86_64-linux-clang/qnn-onnx-converter \
 7  --input_network aimet_export/resnet18/resnet18.onnx \
 8  --input_list target_raw_list_host.txt \
 9  --input_encoding 'input_data' other \
10  --batch 32 \
11  --quantization_overrides aimet_export/resnet18/resnet18.encodings \
12  --act_bw=8 \
13  --weight_bw=8 \
14  --debug \
15  --output model/resnet18_int8.cpp
16
17# compile a dynamic library which represents the model
18${QNN_SDK_ROOT}/bin/x86_64-linux-clang/qnn-model-lib-generator \
19  -c model/resnet18_int8.cpp \
20  -b model/resnet18_int8.bin \
21  -o model_libs
22
23# generate a serialized context for HTP execution
24${QNN_SDK_ROOT}/bin/x86_64-linux-clang/qnn-context-binary-generator \
25  --backend ${QNN_SDK_ROOT}/lib/x86_64-linux-clang/libQnnHtp.so \
26  --model $(pwd)/model_libs/x86_64-linux-clang/libresnet18_int8.so \
27  --output_dir model \
28  --binary_file resnet18_int8.serialized \
29  --log_level info
30
31# create directory to host the model and data on device
32adb shell "mkdir -p ${DEVICE_USER_DIR}/resnet18_htp_int8"
33
34# copy the runner and compiled model to the device
35adb push ${QNN_SDK_ROOT}/bin/aarch64-android/qnn-net-run ${DEVICE_USER_DIR}/resnet18_htp_int8/
36adb push ${QNN_SDK_ROOT}/lib/aarch64-android/libQnnHtp.so ${DEVICE_USER_DIR}/resnet18_htp_int8/
37adb push ${QNN_SDK_ROOT}/lib/hexagon-v73/unsigned/libQnnHtpV73Skel.so ${DEVICE_USER_DIR}/resnet18_htp_int8/
38adb push ${QNN_SDK_ROOT}/lib/aarch64-android/libQnnHtpV73Stub.so ${DEVICE_USER_DIR}/resnet18_htp_int8/
39adb push model/resnet18_int8.serialized.bin ${DEVICE_USER_DIR}/resnet18_htp_int8/
40
41# set up target list on device
42adb shell "touch ${DEVICE_USER_DIR}/resnet18_htp_int8/target_raw_list.txt"
43for batch in $(seq 0 9); do \
44  adb shell "echo ${DEVICE_USER_DIR}/data/imagenet/raw_test/batch_size_32/inputs_${batch}.raw >> ${DEVICE_USER_DIR}/resnet18_htp_int8/target_raw_list.txt"
45done
46
47# execute the model on the device HTP
48adb shell "cd ${DEVICE_USER_DIR}/resnet18_htp_int8; LD_LIBRARY_PATH=. ./qnn-net-run --backend libQnnHtp.so --retrieve_context resnet18_int8.serialized.bin --input_list target_raw_list.txt"
49
50# copy results from device to host
51adb pull ${DEVICE_USER_DIR}/resnet18_htp_int8/output output/htp_int8
Listing 11.1.5 shows the workflow required to deploy a quantized ResNet-18 model on the HTP using the AI Engine Direct SDK. The overall procedure is similar to what we did for the FP32 model when targeting the SoC’s CPU and GPU. However, there are two key differences in the HTP procedure.
First, the call to qnn-onnx-converter in lines 6-15 generates a quantized model.
We see that the AIMET-derived quantization parameters (line 11) are used, and that int8 is used for the weights and activations (lines 12-13).
The --input_list argument in line 8 is mandatory.
Here, one could derive the quantization parameters directly in the SDK, without going through AIMET.
The locations of the required example data would then be specified in the target_raw_list_host.txt file.
This step is unnecessary in our case, since we overwrite all parameters with those derived in AIMET.
Second, in lines 24-29, a serialized version of the quantized model is derived for HTP deployment.
This model is then deployed in lines 35-48.
If we want to run the quantized model on the CPU or GPU, we can simply use the dynamic library generated by the qnn-model-lib-generator in lines 18-21 as before.
Task
Run the quantized ResNet-18 model on the CPU, GPU and HTP of the SM8550P SoC. Verify that the three accelerators produce the same results. Do you notice any loss in accuracy?
11.2. Benchmarking the Accelerators
The AI Engine Direct SDK provides the qnn_bench.py tool to benchmark the performance of one or more accelerators.
 1{
 2  "Name":"resnet18_fp32",
 3  "HostRootPath": "resnet18_fp32.repo",
 4  "HostResultsDir":"resnet18_fp32.repo/results",
 5  "DevicePath":"/data/local/tmp/alex/qnnbm.repo",
 6  "Devices":["3000a4df"],
 7  "Runs":10,
 8
 9  "Model": {
10    "Name": "resnet18_fp32",
11    "qnn_model": "model_libs/aarch64-android/libresnet18_fp32.so",
12    "InputList": "./target_raw_list.txt",
13    "Data": [
14      "data"
15    ]
16  },
17
18  "Backends":["CPU", "GPU"],
19  "Measurements": ["timing"]
20}
As a user, we need to provide a JSON configuration that describes the parameters we are interested in. An example for our FP32 ResNet-18 model is shown in Listing 11.2.1. The model to be benchmarked is specified in line 11, and the benchmarking input is specified in line 12. We instruct the tool to benchmark the CPU and GPU in line 18. The remaining parameters are described in the “Benchmarking” section of the AI Engine Direct SDK Reference Guide.
Tasks
Benchmark the performance of the FP32 ResNet-18 model on the CPU and GPU of the SM8550P SoC. Report the inference performance as “required time in seconds per sample”.
Benchmark the performance of the int8 ResNet-18 model on the CPU and HTP of the SM8550P SoC. Report the inference performance as “required time in seconds per sample”.